Stress-Testing Your Infrastructure Before It Counts: A Structured Pre-Launch Load Testing Framework
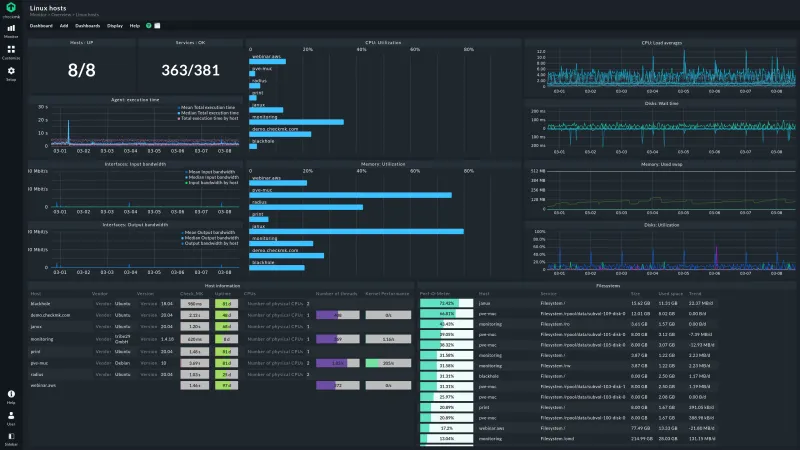
Photo: server load testing performance monitoring dashboard engineers, via checkmk.com
Why Most Infrastructure Failures Are Preventable
Post-mortem reports from major application outages share a consistent pattern: the failure mode was not exotic. Databases that could not sustain the query volume. Load balancers misconfigured for the actual traffic distribution. Auto-scaling policies that triggered too slowly to absorb sudden spikes. In nearly every case, the conditions that caused the outage were reproducible — and would have been visible under controlled testing conducted before launch.
Load testing is not a new concept, but it remains underutilized, particularly among small and mid-sized businesses preparing for significant traffic events. Product launches, seasonal sales campaigns, media coverage, and marketing pushes can all generate traffic volumes that dwarf normal operating conditions. Without prior validation, the hosting environment that performs adequately under everyday load may collapse under the conditions it was ostensibly provisioned to handle.
The 72-hour framework described here is designed to be practical for teams without dedicated performance engineering resources. It does not require enterprise tooling or a specialized testing department. It requires methodical execution, the right instruments, and a clear understanding of what you are actually testing.
Phase One: Defining Your Load Profile (Hours 1–12)
Effective load testing begins with accurate modeling. Before generating a single simulated request, your team needs to define what realistic traffic looks like for your specific application and anticipated event.
Start by pulling historical analytics data. Identify your peak concurrent user counts, your busiest request paths, and the ratio of read to write operations your application typically handles. If you are launching a new product with no prior traffic history, use industry benchmarks appropriate to your sector and apply a conservative multiplier — typically two to three times the expected average — to account for the unpredictability of launch-day behavior.
Document the critical user journeys that your load test should simulate. For an e-commerce platform, this typically includes product page views, search queries, cart additions, and checkout completions. For a SaaS application, it might include login flows, dashboard loads, and API calls from connected integrations. The goal is not to simulate every possible user action — it is to simulate the actions that place the most meaningful demand on your infrastructure.
At this stage, also define your success criteria. What response times are acceptable under peak load? What error rate threshold constitutes a failure? These definitions need to be established before testing begins, not interpreted retroactively from the results.
Phase Two: Baseline and Ramp Testing (Hours 12–36)
With your load profile defined, begin with a baseline test at normal operating conditions. Run your simulated user journeys at the traffic volume your application handles on a typical day and record response times, server CPU and memory utilization, database query latency, and error rates across all components. This baseline is your reference point — every subsequent test result is meaningful only in relation to it.
From the baseline, execute a series of ramp tests that incrementally increase concurrent user load in defined steps. A common approach is to increase load by 25 percent of your target peak every 15 minutes, holding each level for long enough to observe steady-state behavior rather than just the initial response. Watch for the point at which response times begin to degrade non-linearly — this is typically where a bottleneck is being approached.
Common bottlenecks identified during ramp testing include database connection pool exhaustion, insufficient memory allocation causing swap utilization, and network I/O saturation on underpowered instances. Each of these has a specific remediation path, but none can be addressed if it is not first identified.
Tools such as Apache JMeter, k6, and Locust are well-suited to this phase and are accessible to teams without significant performance testing backgrounds. Cloud-based load testing services, several of which integrate directly with major US cloud providers, offer the additional advantage of generating traffic from geographically distributed origins — a more accurate simulation of real user behavior.
Phase Three: Spike and Endurance Testing (Hours 36–60)
Ramp testing reveals how your infrastructure responds to gradual load increases. Spike testing reveals something different and equally important: how it responds to sudden, discontinuous jumps in traffic.
A product launch announcement shared by a high-reach social media account, a feature mention in a major US tech publication, or a coordinated email campaign send can all generate traffic spikes that arrive within seconds rather than minutes. Spike testing simulates this pattern by jumping from baseline traffic to peak load instantaneously, then observing both the immediate response and the recovery behavior when load returns to normal.
Endurance testing addresses a third failure mode: systems that perform well under peak load for short durations but degrade over extended periods due to memory leaks, connection accumulation, or log file growth. Run your target peak load continuously for a minimum of two hours during this phase and monitor system resource trends over time. A server that handles 500 concurrent users gracefully for ten minutes may exhibit measurable performance degradation after 90 minutes if memory is not being released correctly.
During both test types, pay particular attention to your auto-scaling configuration if you are operating in a cloud environment. Verify that scaling events trigger within your acceptable response window and that newly provisioned instances are correctly added to the load balancer pool before existing instances become saturated.
Phase Four: Analysis, Remediation, and Validation (Hours 60–72)
The final phase transforms test data into action. Review the results from all prior phases systematically, cross-referencing application-level metrics with infrastructure-level observations. A slow database query identified during ramp testing may require index optimization, a query rewrite, or a caching layer — the appropriate fix depends on understanding both the symptom and its cause.
Prioritize remediations by their potential impact on the launch. Address any issue capable of causing a complete service outage first, followed by those that would produce unacceptable response times under peak load. Performance improvements that would be beneficial but are not critical to the launch can be scheduled for post-launch implementation.
After applying remediations, run a condensed validation test at your target peak load to confirm that the changes have produced the expected improvements. This final run also serves as a confidence check for the team — evidence, grounded in data, that the infrastructure is prepared for what is coming.
The Value of Testing as Organizational Practice
A 72-hour pre-launch stress test is not a one-time exercise. The infrastructure conditions that make a system reliable under load today — provisioned capacity, optimized queries, correctly configured scaling policies — can drift as applications evolve, data volumes grow, and traffic patterns shift.
Organizations that build load testing into their standard release process, rather than treating it as an exceptional pre-launch activity, accumulate a meaningful operational advantage. They encounter fewer surprises, recover from incidents faster, and make infrastructure investment decisions grounded in performance data rather than estimation.
The hosting environment your business pays for should be one you have actually validated. Testing is how you confirm that the infrastructure you have purchased is the infrastructure you actually have.